Tuesday, 30 December 2014


Don't forget to check out these fantastic, discounted products! Go to http://www.stampinup.net/esuite/home/melsstampinblog/promotions! Only while stock lasts!

Monday, 22 December 2014

Merry Everything - a bit more than a gift card holder


Hello!

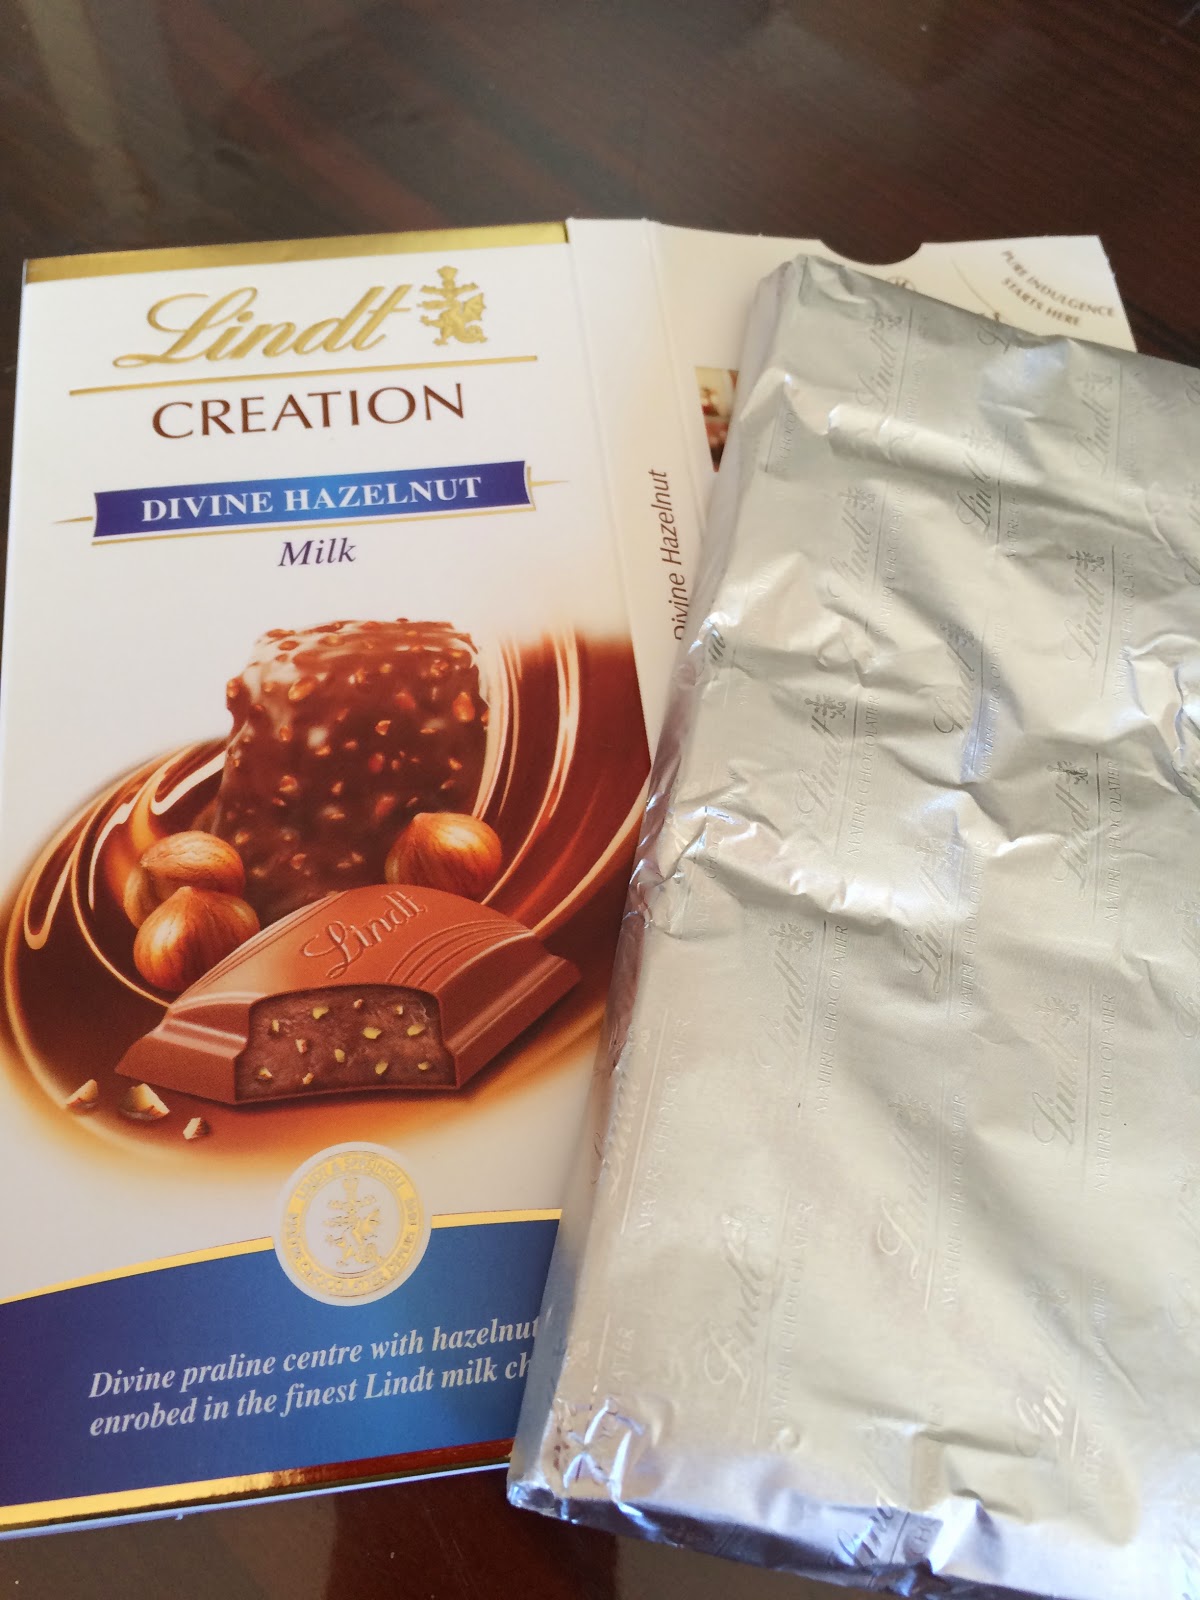
Having a son with Autism makes me appreciate teachers and their helpers (Educational Assistants) even more! Not to mention that my Mother-in-law is a teacher and I know that teaching is not a 9-3 job with 3 or 4 holidays in a year - it is HARD WORK being a teacher. That is why I love to thank them in a special way at the end of the school year. This year I made up a little gift card holder that included a 100g Lindt Chocolate bar. 

These are the products I used:
135825 Under the Tree DSP ( see photos for instructions) HC, p5
133704 Typeset DSP, AC, p184
135839 Cherry Cobbler 1" Sheer linen Ribbon, HC, p7
135071 Merry Everything Clear stamps set, HC, p13
135860 Note Tag Punch, HC, p13
106549 Whisper White A4 cardstock, AC, p183
121681 Cherry Cobbler A4 cardstock, AC, p182
126973 Garden Green Classic Stampin' Pad, AC, p182

Instructions:

This is the chocolate I used. I removed the wrapper to make a new wrapper with the DSP.

Cut the DSP to 8 1/4" x 7 5/8"
With the long side to the top  of your Simply Scored Scoring Tool (122334), AC, p214 score at 5/8", 1", 7 1/4", 7 5/8"
On the short side score at 1", 1 3/8", 4 3/8", 4 6/8"
Enforce folds.

Cut as follows. I used my 1"Square punch (124094) to take a 2 "nicks" from the thin flap.


Round corners with Project Life Corner Rounder (135346), AC, p222


Place the chocolate bar inside and adhere the box. I used temorary adhesive, 2-way Glue pen (100425) is temporary when you let it dry for a bit.


Cut Typeset DSP to 7 1/2 x 7 1/2" and with the bottom of the writing on your left hand side on your score board score at 1 1/2"and 3 1/2".


Fold as follows and wrap around and decorate with the ribbon and tags. Insert your gift card into the pocket!


I think this will make a nice gift for the pickiest of persons! 

Well this is it for the year from me! I had fun sharing my projects with you and wish you and yours a wonderful, peaceful Christmas Season! My you be Blessed in the New Year!

Mel xx


Santa Stache - Shaker card


Hello again!

For my second last post for this year I would like to share my very first shaker card! It was easier than I thought and the effect is to say the least... DAZZLING!

I am going to list the products that I used and then show the steps in photographs! Enjoy!

106578 Real Red A4 cardstock (card base), AC, p180
106576 Old Olive A4 cardstock (layering), AC, p180
135821 Santa & Co. DSP (some more layering), HC, p29
135035 Santa Stache stamp set ( stamp twice, one to die cut the mustache and one to colour and fussy cut the whole image), HC, p18
106549 Whisper White A4 cardstock (inside and stamping), AC, p183
121688 Basic Black A4 cardstock (frame around circle), AC, p183
132178 Silver Foil sheets (star)
132708 Memento Ink Tuxedo Black ( for image and sentiment) VERY important to use this with Blendabilities)
130995 Cherry Cobbler Assortment Blendabilities (hat) AC, p212
129370 Skin Tone Assortment Blendabilities (face), AC, p212
102283 Versamark ink, AC, p210
101930 Iridescent Ice embossing powder (for hat trimmings, beard and moustache), AC, p213
114323 Window Sheets , AC, p192 Cut two 3 1/2" x 3 1/2" pieces
133723 Star Framelits, AC, p231 
130911 Circle Framelits, AC, p231, I used the 2 3/4" circle and the 3 1/4" ( the bigger one for the black frame)
133741 Mustache Framelit AC, p230

Layer the DSP and Old Olive and cut a circle from the center with circle framelits.

Mark with a pencil on the card base where the circle should be cut (centered on the card base) and the cut.


Cut circle using Circle framelits.


Do not adhere yet! First the shaker must be assembled.


Adhere 1 of the window sheet pieces with  2-Way Glue Pen (100425)on the inside of the layered DSP and Old Olive.


Use Double sided foam tape around the circle on top of the first Window sheet layer.


Add some glitter and Sequins ( any will do) and then adherte the second piece of Window sheet over the glitter and sequins. This piece is adhered to the foam tape.


Add some foam tape to the corners and adhere to your card front.

 Add your Basic Black circle frame and your finished Santa.
 Stamp your sentiment on the inside.

I hope this all makes sense! Let me know!

Thank you for passing by!

Mel xx


Friday, 5 December 2014

All is calm

Hi!

As it goes this time of year... So much to do, so little time!!! I'm officially in panic mode! I still have to finalize teacher gifts and Christmas cards, family and friend cards, etc, etc! Also two birthday cards ( one by Sunday!). I do think, however that I might just have all the cards covered...


Voila! I can easily wrap up 10 or 20 of these in a very short time! I can also easily use this basic recipe for my two birthday cards! I'm feeling better already!

For the card base (folded 4"x 4" card)  I used Pear Pizzazz A4 cardstock (131290). I cut two strips from the All is Calm DSP (p22, HC, 135823) measuring 1" x 6" and positioned it on top of Whisper White A4 cardstock  (p183, AC,106549) measuring 3 3/4"x 3 3/4". Take a look at my photo to get an idea of where to adhere the DSP strips. Next I stamped the medium snowflake from the Endless Wishes Photopolymer stamp set (p32, OC, 136829) underneath the DSP strips and heat embossed Merry Christmas (from the same stamp set) with some Silver Embossing Powder (p213, AC, 109131) and embellished with the lovely Lost Lagoon Silky Taffeta Ribbon (p22, OC, 135841). I first adhered a piece of ribbon between the two DSP strips and then tied a bow with the same ribbon to put on top of it. Also add some bling - never forget the bling!

Take care!

Mel xx

Ns Two more along the same line!


Thursday, 27 November 2014

Nature's Peace

Hello again!

Today I'm sharing another Holiday card with you! Christmas is not creeping  up anymore, it is upon us!

For this card (a shaker card) I used the lovely Nature's Peace stamp set (135119 -clear). Although this project features my other hidden talent - cardstock stitching (LOL!) - yes that is as far as it goes, it is still a very quick and fun card to make!

I started by stamping the snowflake image from the same stamp set in Melon Mambo (126948) and some in Daffodil Delight (126944) ink . Then I used the tiny snowflake from the Endless Wishes Photopolymer stamp set (136829) to stamp some snowflakes with Old Olive (126953) and some with Bermuda Bay (131171) ink to fill the spaces in between. I stamped on  water colour paper (any brand will do) for some extra texture. Next I heat embossed the Peace on Earth image with  Pool Party Embossing Powder (129398) - I used VersaMark  ink (102283) with my embossing powder and I stamped on White Vellum Cardstock (106584). I placed about 15 or so sequins ( all colours, shapes and sizes) on top of my snowflake image ( in the middle of the snowflake stamped cardstock) and placed my vellum over this. To keep it all together, I used  strips of painters tape,and stitched it together. Be aware of where the stitching will go and where your strips of painters tape will go - you don't want to stitch over the tape! For my card base I used Naturals Ivory A4 cardstock ( I love this stuff!). I used rhinestones to add a bit of shine to my card.

There you have it! I think it turned out pretty well!

Mel xx

Saturday, 15 November 2014

Wondrous Wreath - Joy


Hello!

This week my projects featured the lovely Wondrous Wreath Photopolymer stamp set (135047) as well as the coordinating Wonderful Wreath Framelits Dies (135851). Remember if you bundle you save!

Products used for this card:
133674 Kraft Cardstock (Card base)
106578 Real Red A4 Cardstock (Layering)
135825 Under the Tree DSP (Dotted Layer)
106549 Whisper White A4 Cardstock 
127885 Champagne Glimmer Paper (Joy die, I cut 3 extra from scrap cardstock to layer for a thicker, more substantial finish)
100425 2 - Way Glue pen ( perfect for when you need a tiny bit of wiggle time - in this case to layer the Joy sentiment)
131180 Pear Pizzazz Classic Stampin' Pad (first layer of leaves)
126953 Old Olive Classic Stampin' Pad (second layer of leaves)
126949 Real Red Classic Stampin' Pad (berries)
132141 Metallic Encore Ink Gold (stamped sentiment inside)
130911 Circles Collection Framelits (to cut window through top layers, I used the 4th circle from the centre)
135840 Real Red 3/8"  Satin Woven Ribbon (This ribbon is soooo beautiful and easy to work)!

I think I will be making a few more of these for my daughter's class! 

I hope you like it!

Mel xx


Friday, 7 November 2014

Under the tree - Precious little box


Hello again!

As promised my little box! I used the Gift Box Punch Board (135863) to make this adoring little box - inside I put a little votive candle (bought a pack of 12 from Big W recently).

To decorate the candle I used one of the snowflake stamps from the Many Merry Stars Photopolymer stamp set (138105). This stamp set is from the Merry & Bright Exstra Special Christmas flyer and all products from this flyer is only available as long as stock lasts!!! Hurry, you don't want to miss out! The snowflake image was stamped onto white tissue paper with Gold Metallic Encore ink (132141). I used one of the Circles Collection Framelits to die cut the image and then punched a tiny hole in the middle of the snowflake circle to fit easily over the candle wick and lastly used my Heat Tool to melt the tissue paper into the candle wax. I should mention that the little votive can get very hot, so be careful! Also keep in mind that this makes the candle only a decoration - not for burning! If you want the candle to be lit, leave these steps!

Next up the little box! This box is not only easy but also very fast to make, because of Stampin'Up!'s Gift Box Punch Board! To make my it possible to fit a loose lid over the box, I needed to make a few modifications to my Gift Punch Board Box. My box was made by following the instructions ( already printed on the Gift Box Punch Board - how fantastic is that!) for the smallest box.  I used a 6"x 6" (15cm x 15cm) piece of my DSP, this way you can get 4 similar size boxes from one piece of 12" x 12" DSP or Card stock! If you prefer a bigger box you follow the same steps as shown in my photos to form your box. It is really super easy! For the bottom of my box I used Stampin'Up!'fantastic NEW Kraft Cardstock (133674), perfect for 3D items and also for stamping and card making!

Follow these steps to form the bottom of the box:
This is what the box looks like when you follow normal instructions printed on the Gift Box Punch Board
Cut off all 4 the "pointy bits".

Cut to the first score line on all 4 sides by rotating the box once after each cut.

I also cut away on the diagonal lines, this makes the box look nice and tidy once adhered.


And last but not least, Sticky Strip (104294) of course! Adhere to form your box.

For the lid I used a 4"x 4" of Under the Tree DSP (135825) and scored at 1" (2.5 cm)on all 4 sides. I die cut a small star from the centre panel of the lid, using the Stars Framelits (133723). Keep the tiny star you cut from this. Cut the 4 tabs same as in the photo above, apply Sticky Strip and adhere.


To decorate the lid I used the smallest and second smallest star from the Star Framelits to die cut a frame from a Gold Foil Sheet (132622) and used this to frame the star on my lid.


Finally I used the 2 tiny stars to tie around my box with some Linen Thread (104199). Use a piercing tool to push a tiny hole through the stars - I used a needle to thread the linen through the stars.

I love the finished product! I hope you like it too!

Mel xx